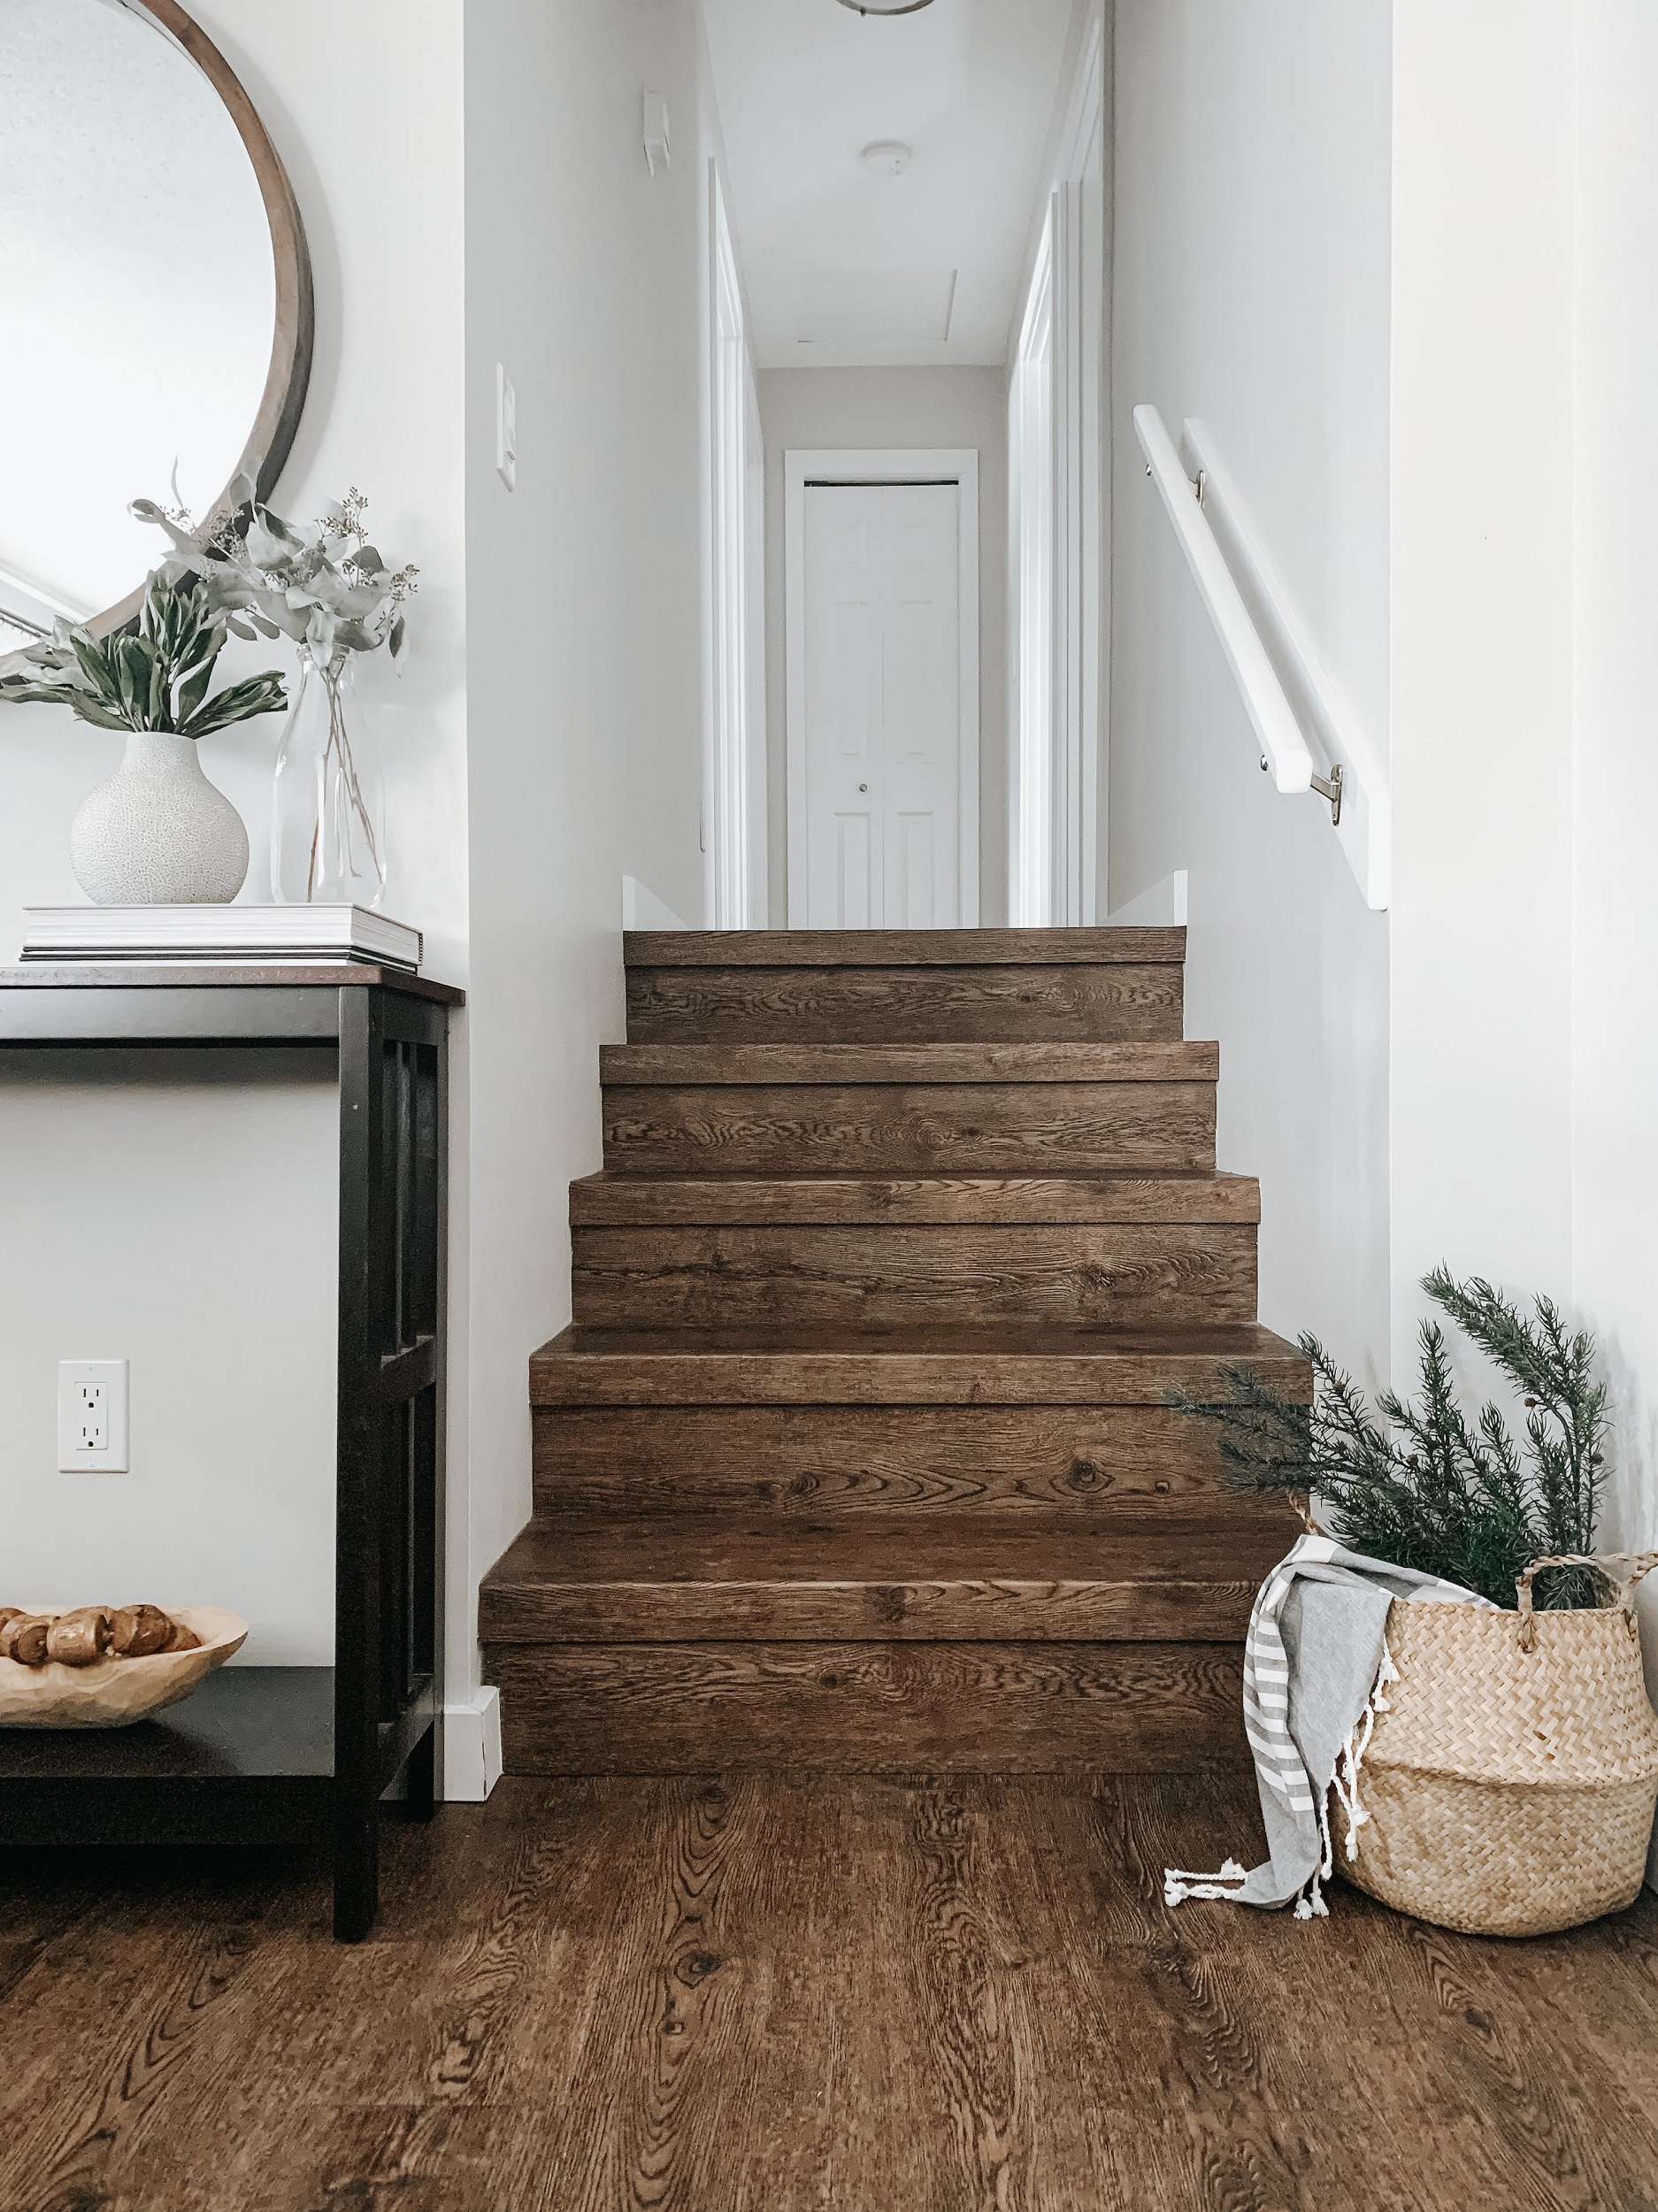
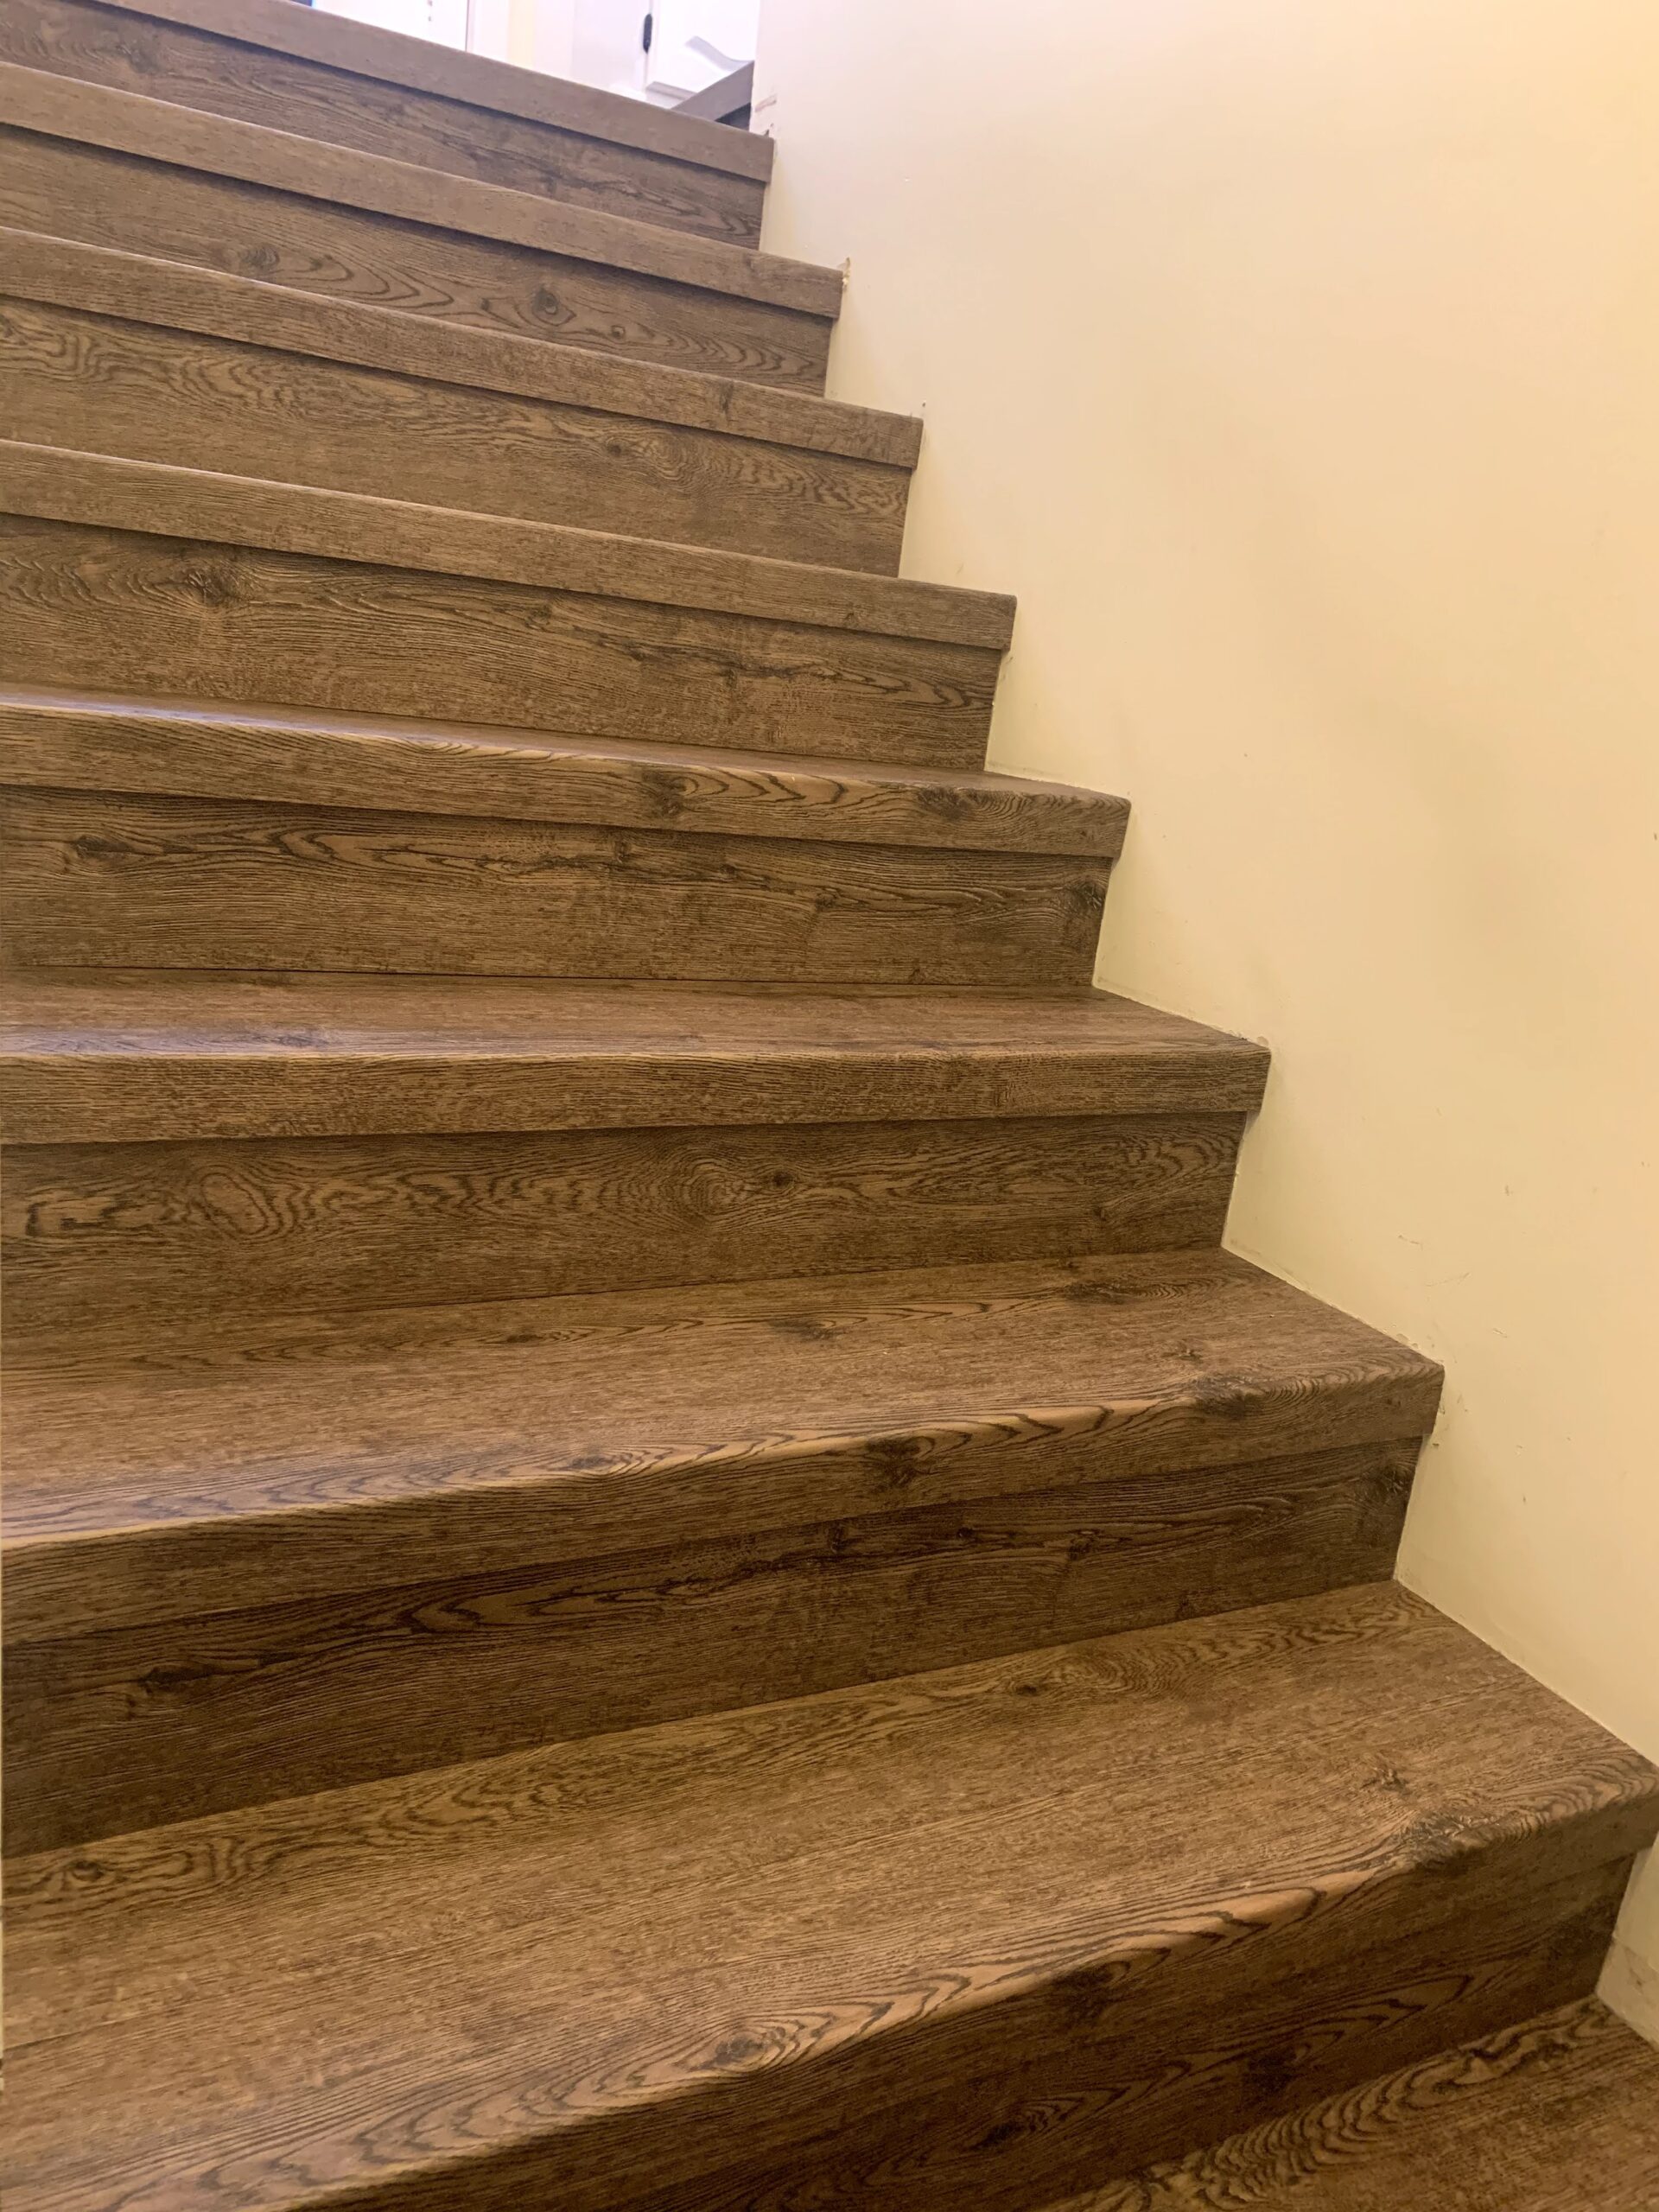
When we were replacing the flooring in our house we found the vinyl planking we loved, but there was a problem. The company didn’t manufacture a stair nosing to match. We were going for a seamless look, so we really didn’t want a rubber or metal stair nosing.
It took some conversation and brainstorming with the owner of the store we purchased our flooring from, since he knew the product better than we did, and together we came up with an easy DIY solution!
Essentially we had to experiment on how to bend the flooring ourselves to create our own nosing piece. We did this by notching out the under side of the plank to allow for a bend and then adhering it to the step itself.
We first counted how many pieces of stair nosing we would need. Then measured how long we needed the nosing piece to hang down. We did 2 1/4 inches.
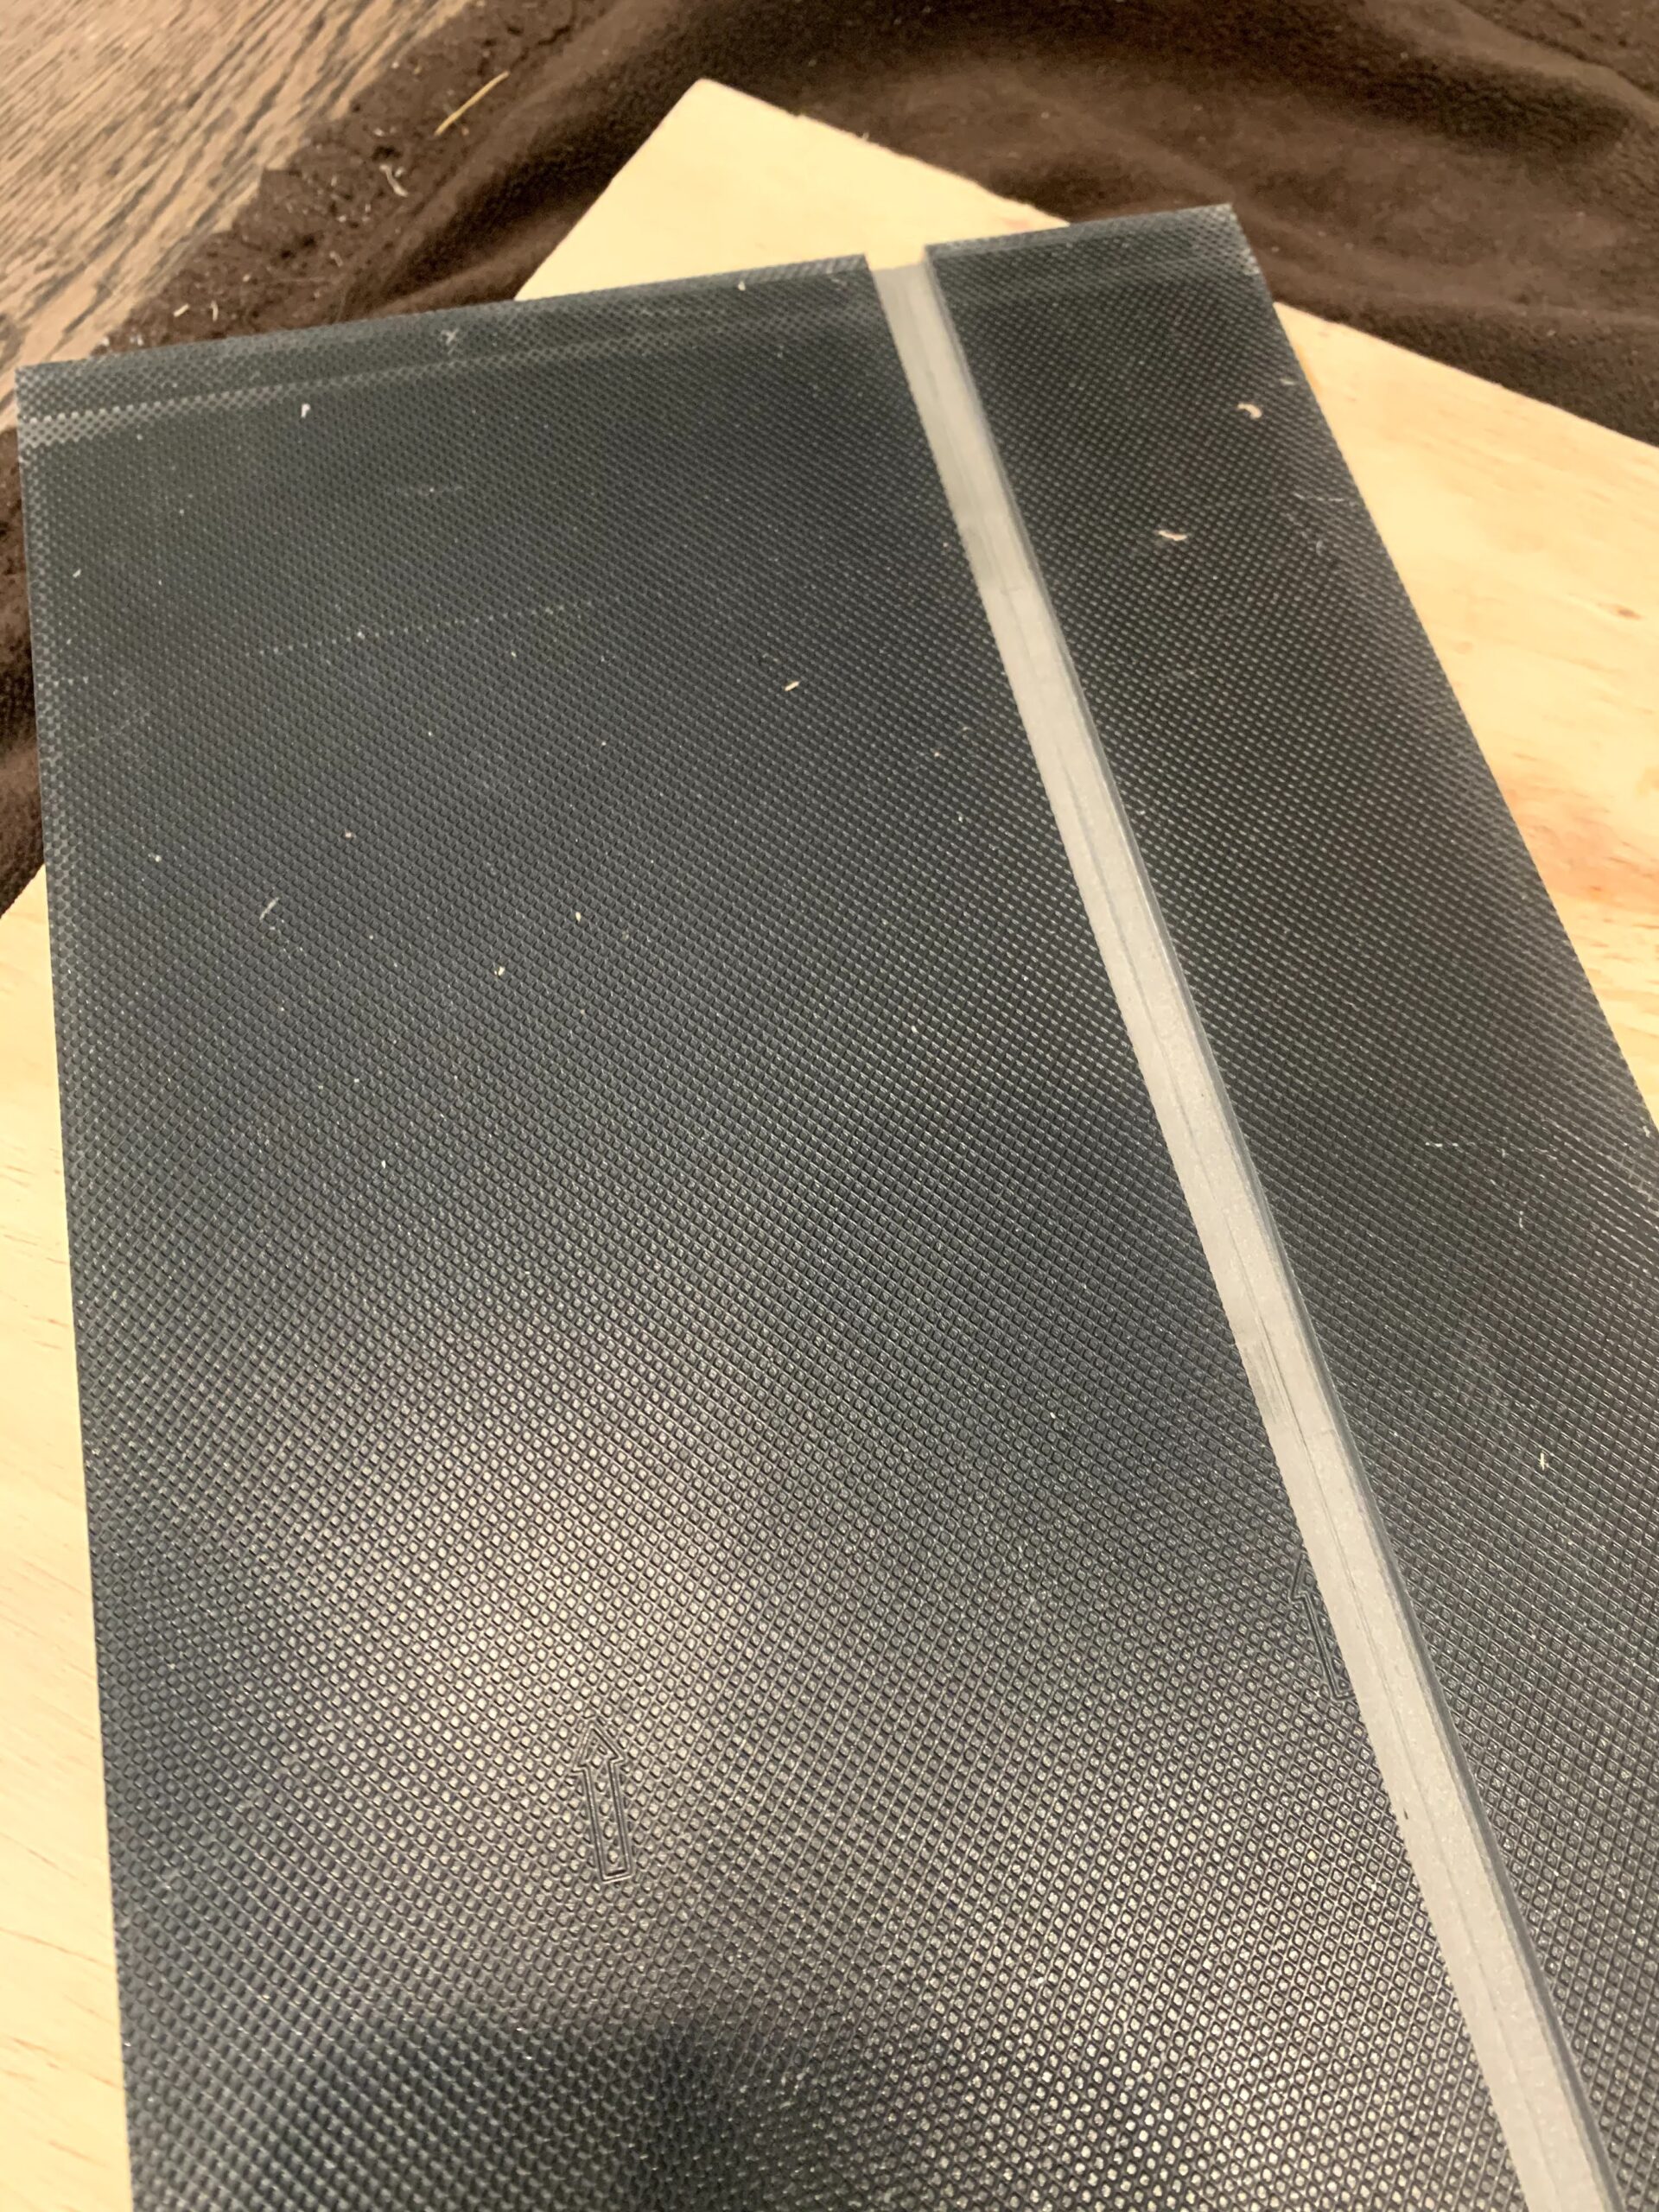
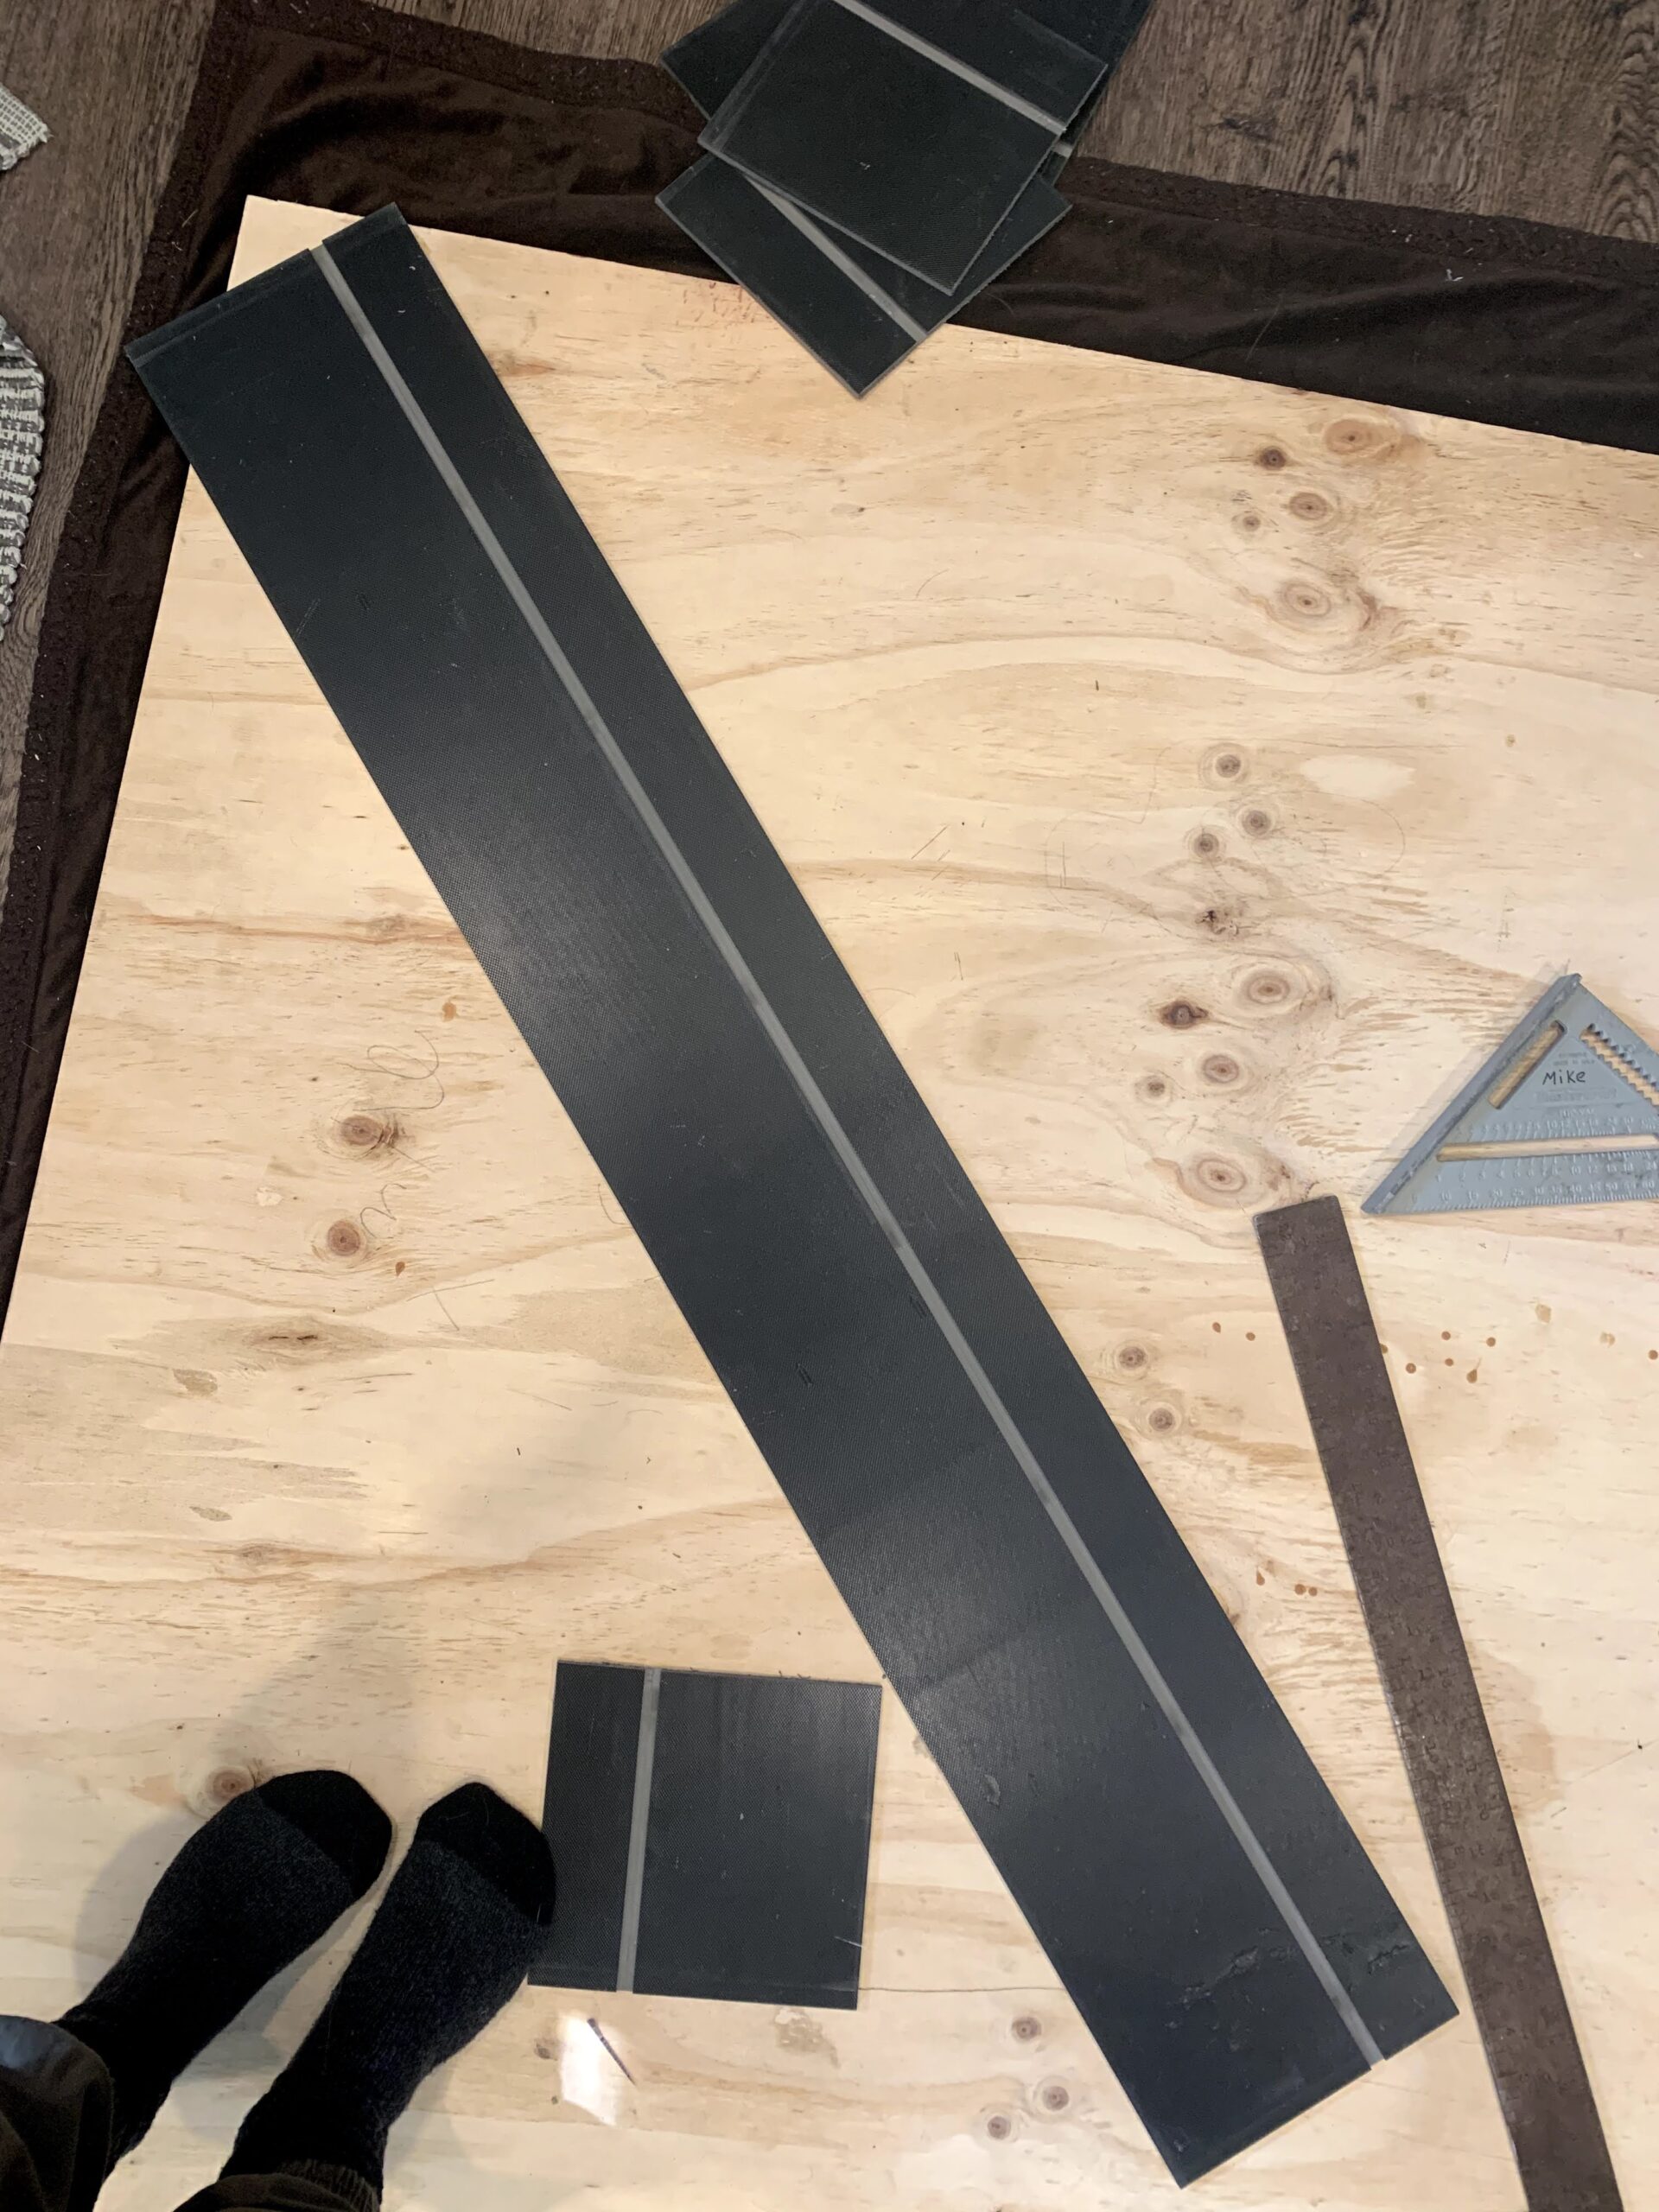
We then ran the pieces of flooring through the table saw. This took some trial and error since the aim wasn’t to go right through the plank. We wanted to remove enough of the underside to be able to create a bend in the plank without altering the look or structural integrity of the front side.
To find the depth of the notch we needed, we just ran a scrap piece of plank through the table saw until we had the right depth. The plank had to be able to easily bend without cracking or stretching on the outer side. We found too that the notch needed to be 3 blades width.
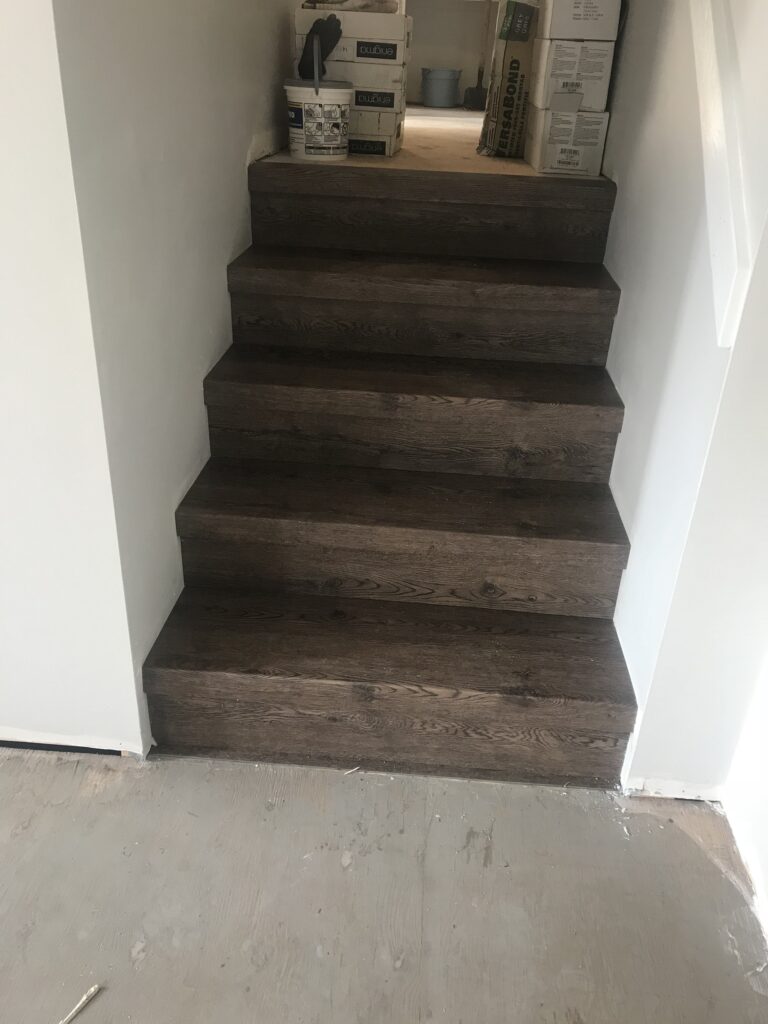
Once all of our planks were notched, we cut them to size length-wise for each step. You can do this with either a chop saw or just a flat blade and a t-square. We did this piece-by-piece, installing them as we went.
Side note: Because we were just replacing existing vinyl plank, we just ripped up the old and laid the new as we went. If this isn’t the case for you, make sure to spread the adhesive compound over every step beforehand so it’s ready to go. I recommend starting from bottom to top of the stairs to avoid disrupting the adhesive since it’s super sticky!
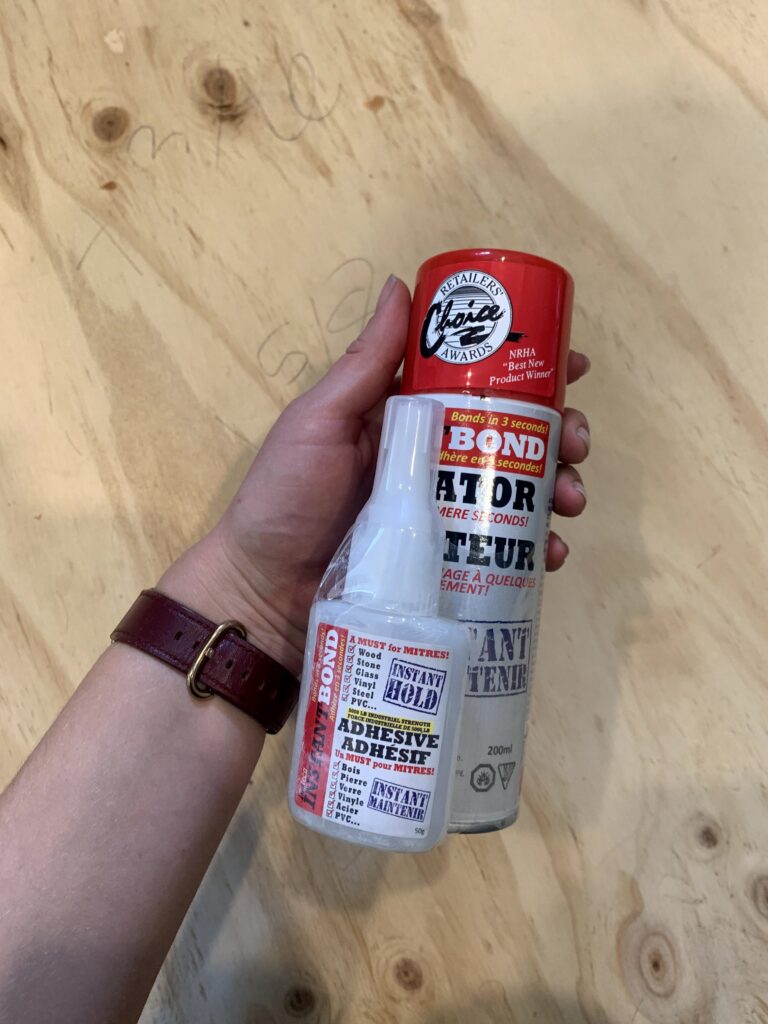
To install the nosing piece once cut to size, we set it on the step so the notch met up with the edge of the step from below. We then used a hairdryer to warm the plank over the notch, otherwise it was very hard to bend and to avoid possible cracking. Once easily bendable, we used an instant bond, 2 part adhesive (pictured below) and it worked amazing! Then it was just working quickly to apply the two adhesive components, bend, stick, and hold the nosing in place for a few seconds while waiting for the glue to bond and that was it!
Since we weren’t able to find any other DIY solutions online, we crossed our fingers this would work and hold up over time. We used this technique for the first time about 3 years ago and it’s held up flawless so we just did it again for our basement stairs! The nosing hasn’t ever lifted, the floor pattern hasn’t cracked or stretched over the bend of the nosing. If the vinyl plank you choose has a manufactured nosing, that would definitely be easier, but don’t pass up flooring you love just because there isn’t one!